
Details
There may be instances where you need a contact to submit some information (optionally including a file upload) and then send them an automated confirmation email as soon as this has been done.
Although you can create this automation workflow using both our Standard and Advanced automations, using our Advanced automations for this will offer much more flexibility - such as filtering by form or any other details saved against the contact record (such as location, name, email or any other parameters you choose).
What This Example Will Cover
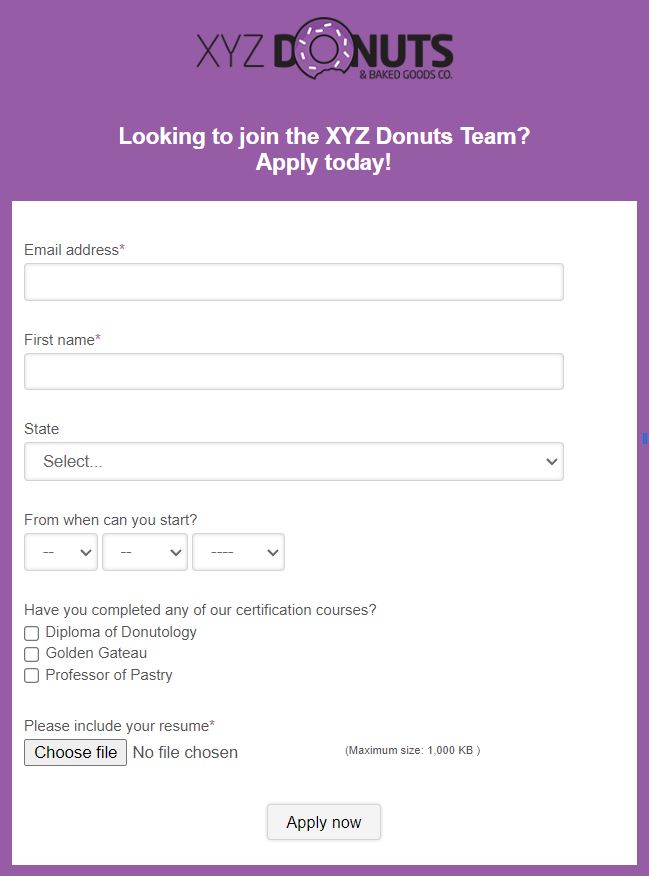
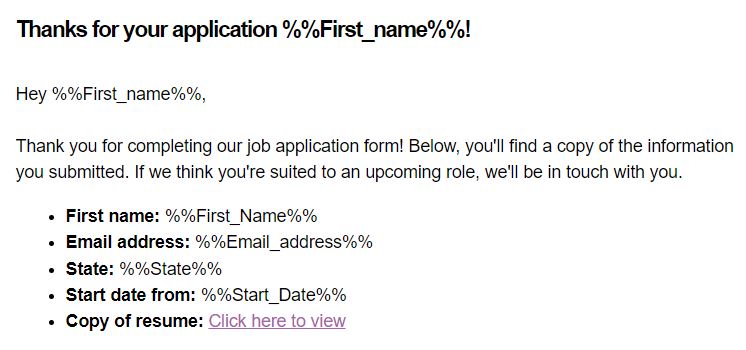
In this automation example, we will be creating a subscription form (shown below) that asks the user to upload some details - including a resume file. Upon doing so, we will have the system automatically send back a confirmation email which will display the information they entered - including a link to the file they uploaded.
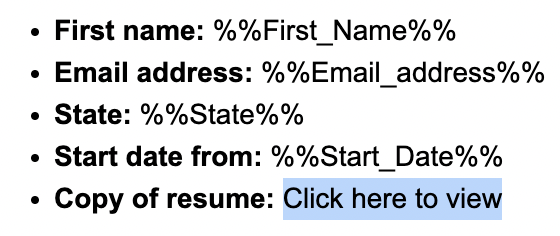
Here's what our confirmation email looks like;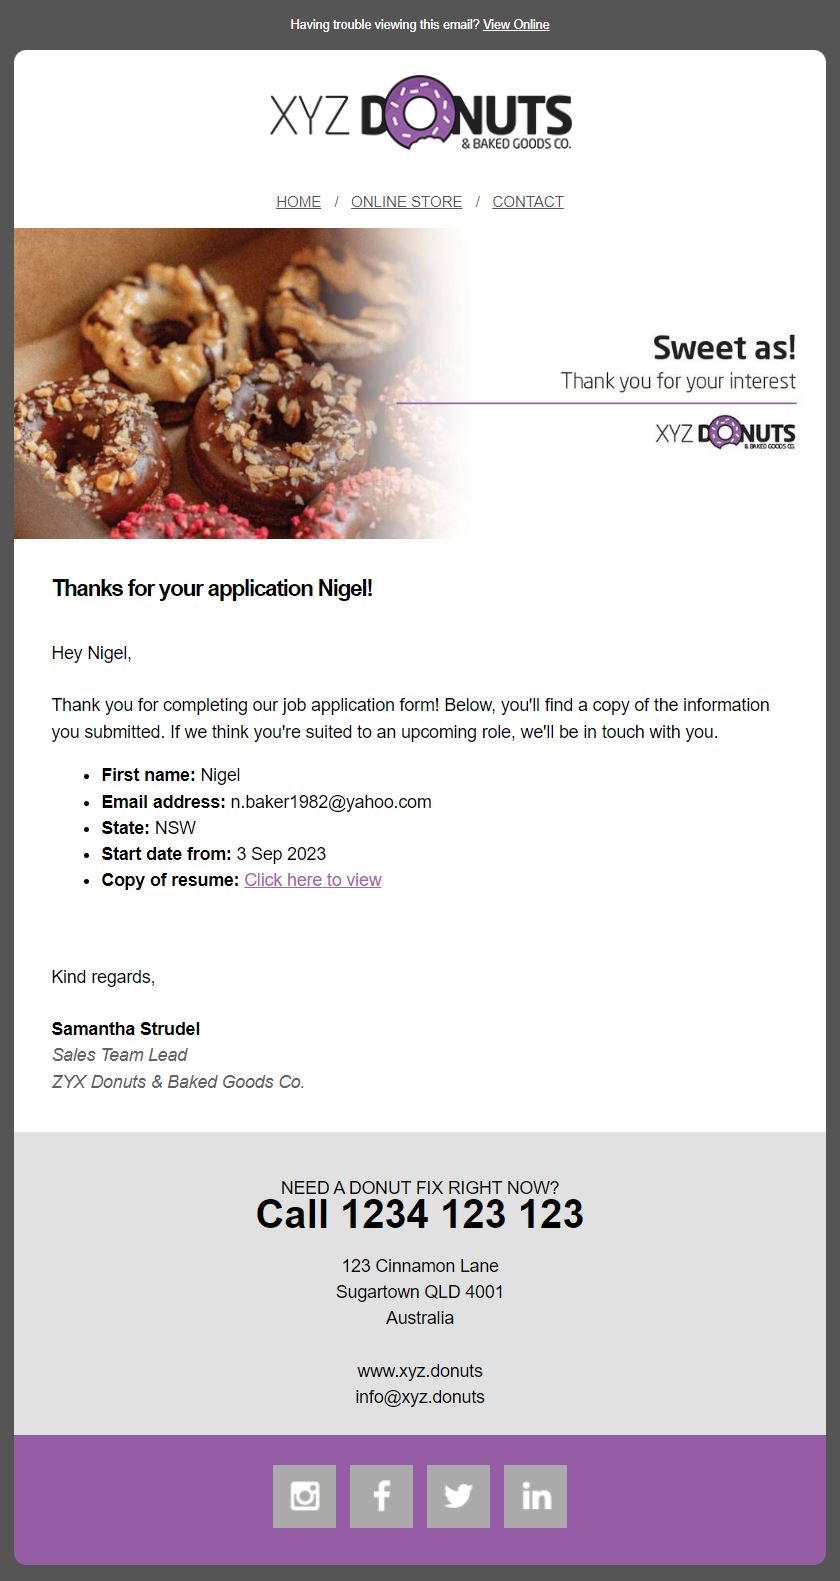
A Few Notes
- The file upload is optional; if you don't need it you can leave this field off the form.
- Our system has several different types of forms. You can use either a 'Subscribe' form or an 'Update Profile' form for this. As per standard form behaviour, the Subscribe form will add a new contact when the form is submitted (this will create a duplicate if the contact already exists on the list). Using an Update Profile form will update the existing contact record when the form is submitted (this option is best if you are emailing the form link to your existing contact list).
- As noted in the introduction, you can use our Standard or Advanced automations for this. However, if you have more than one 'Subscribe' form or 'Update Profile' form on your list, please realise that this automation will trigger for all of the relevant forms - even if some of the forms are meant for something else. Using our Advanced automations will allow you to get around this, as you can filter by form.
How-to Guide
Part 1: Creating the Form
In this first section, we'll create the form that our contacts will fill in to join our list. As mentioned previously, you can use either a 'Subscribe' or 'Update Profile' form type for this. As our example is a job application form that will probably live on a website, we will create it as a Subscribe form type. However, if you are emailing a form link to your contact list, you'll likely want to create it as an Update Profile form type.
- Select Lists and Forms from the sidebar.
- Follow the steps / prompts to create a new list.
- Double-click on your list to go into Forms view.
- Once in Forms view, ensure the Subscribe form is selected.
- Use on the right to create the various fields you'd like to have on your form. In the case of our example, our list already had 'First name' and 'Email address' fields, but we created new fields for the contact's 'Start Date' (a Date field), 'Resume' (a File Upload field) and to track if they've completed any of our 'Certification courses' (a Checkbox field).
Explore the various different field types - Add a New Field to a Form or List, or Edit a Field - Customise the appearance of your form if desired.
- When done, press . Nice work, you've now created a form that people can fill in to subscribe to (join) your list as a new contact. If you wish, you can now also add this form to your website or link to it from an email.
Part 2: Creating the Email
In this second section we're going to create the email that gets sent back to the contact once they complete the form.
- Select Messages from the sidebar.
- Create a new email message (or copy an existing one), then open the message for editing.
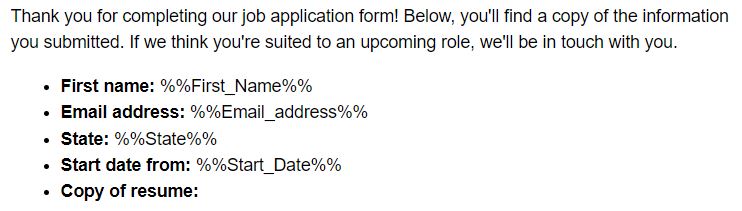
- Design your email as desired. In the relevant section, use the Wildcard tool (located on the floating toolbar when you're editing text) to insert the wildcards which will display what the contact entered. In our case, we've inserted four text wildcards...
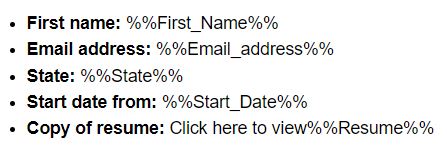
- In the case of our example, we also want to link back to the original resume file that the contact uploaded. Let's type some text into the spot where the link will be. For us, we'll enter 'Click here to view' (as shown at the bottom of the following screenshot)...

- Next, use the wildcard tool to insert the wildcard for the file next to this text (this is only temporary). Our field was called 'Resume', so for us, this now looks as follows...
- Next, highlight the wildcard and 'cut' it by using Control + X (on Windows) or Command + X (on Mac).
- Now we'll insert a link. Highlight the text you'd like to make clickable (for us, we're going to highlight the phrase 'Click here to view'), then click the (insert link) icon on the floating toolbar to open the link tool.
- As the URL for the link, paste your wildcard using Control + V (on Windows) or Command + V (on Mac). For us, the link dialog now looks like this...
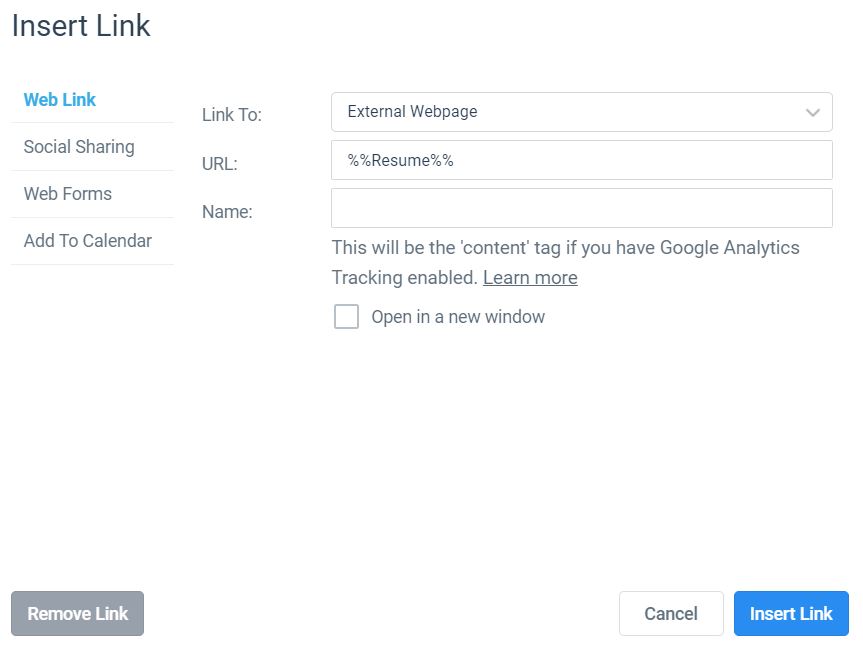
- With the wildcard inserted as the URL, click [Insert Link]. Your email should now look something like this...
- Once done, click . We recommend saving your email into a folder named 'Automation' (or similar), so that you and your colleagues know what it's for and don't accidentally delete it (though the system will warn you if you delete messages that are used by automations).
Part 3: Creating the Automation
We're on the home stretch now! So far, we've created the form for contacts to complete and have built an email. In this final section, we'll build the automation to send it to them.
- Select Automations from the sidebar.
- Click .
- Next to the Create your own automation option, select .
- In the first section, select the trigger as Subscribe.
- In the second section, select the list to use for your automation. In our case, we created our job application form on the 'XYZ Staff' list, so we're going to select the list of the same name here.

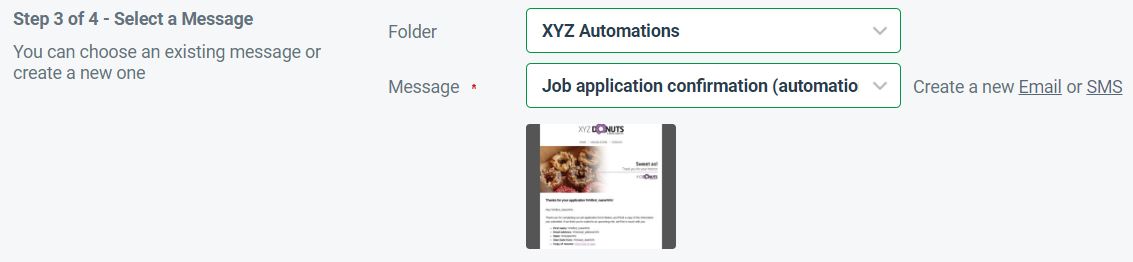
- In the third section, use the dropdowns to select the message you'd like to send as part of the automation (in other words, the one you built in Part 2 of this guide).
- In the fourth section, select the timing of the send. In most cases, you'll want this to be immediately.
- When finished, click . The automation will now trigger when applicable. You can test this by completing the form you created in Part 1.